Table of Contents
Midibox Stuff by John E. Finster
Hi, my name is John. I live in Germany where I also studied Philosophy and Cultural Sciences. I became aware of TK´s ingenious Midibox Project in 2007 and started to learn how to build my own boxes. My first ones consisted of nothing more than a few pots and buttons, a display and a cardboard box. After a few financial crisis and the birth of our wonderful daughter I was forced to lay low for a few years and to take care of more important issues at hand (jobs, family, studies,…). But I dropped by occasionally, read up on all the technical stuff and followed the development of the Midibox Phenomena.
So I never gave up on my Midibox excitement and today I am delighted to present the fruits of my labor ![]() .
.
Many Thanks to TK for creating the Midibox Platform and to the community, which is one of the nicest and most helpful communities I have ever encountered.
My Midibox Projects
Here you can observe some of the projects I´ve been building.
Miditool for Finale 10 - December 2012
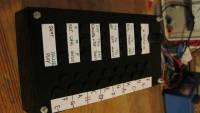
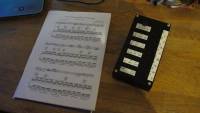
This was my first finished project. I built it as a christmas present for my dad. He plays the trombone and uses Finale 10 on his PC to create and edit scores. But he has a lot of trouble to enter the notes with a mouse or a computer keyboard. He doesn´t play the piano, so he couldn´t use a midi keyboard to do this, so I thought with my Midibox knowledge I could help him a little bit.
This is what came out of it. It´s not pretty, but it´s practical.
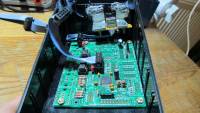
It uses a half stuffed STM32 core and one DIN module.
It´s currently running the MB_LC v2 (32bit) firmware. At that time the MB_NG firmware wasn´t finished and since all the midi events it sends are getting translated by Bome´s Midi Translator anyway before they can be used in Finale 10 I didn´t feel the need to wait.
Midibox Sequencer V4 - June 2013
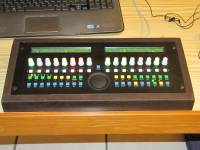
The next Project on my list was a SEQv4. Since I didn´t like the “sidebar” look I went for a more compact and symetrical design.
Instead of seperate GP encoders and leds I put in some nice illuminated encoders. They can be connected just like normal encoders and leds, they have seperate pins for each of them.
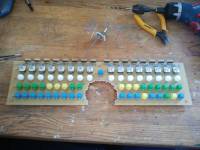
Since I used a custom design I put all the buttons/leds/encoders on a standard 0,1 inch vectorboard. I had to cut a hole into it because I had to fit the data wheel in between.
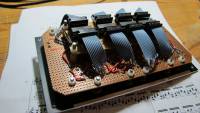
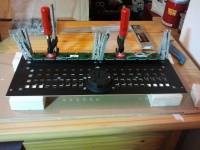
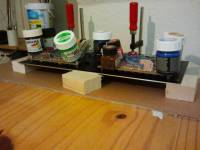
Here you can see the back of the frontpanel with the lcds in place and the jog wheel case. I didn´t use any holes in the frontpanel for mounting screws, I relied solely on a two-component adhesive (“UHU Endfest 300” in my case) that´s why I had to roughen the surface. I did that even with the lcds. First I put the screws into the lcd cases, placed the lcds correctly and locked their position with a bar clamp. The screws are held up with the pegs. After that I placed a drop of adgesive under the screws and removed the pegs so that the screws could “glide” into the adhesive.
I placed some placeholders (screw with a flat head + metal tube) on the “button-side” of the pcb, put some adhesive on the frontpanel as well and gently placed the pcb on the frontpanel. The buttons and knobs guided the pcb to its right position. The leds are just placed roughly on the pcb before I glued it onto the frontpanel and soldered afterwards.
Just a quick look inside the case before I closed it up. Once without and once with the necessary cables. The case is made out of beech wood, some detailed pictures will be provided later on the site.
I left a little to less space between the pcb connectors and the lcds, so in order to connect all the modules to the pcb I had to remove the lcds again. But this went ok, the adhesive didn´t break or crumble or anything.
Midibox NG / Mackie Control Clone - August 2013
My third project was a slightly bigger one. I´ve always wanted to have a Mackie Control based midi controller. And with the new MB_NG firmware coming up more display options were available so I decided to go with some nice SSD1306 OLED displays instead of the regular character displays.
In the end my box features:
- 9 Penny&Giles motorfaders PGFM3200 (8 track faders + 1 master fader)
- 14 encoders
- 2 jog wheels
- 70 multi-purpose buttons
- 18 SSD1306 displays
- customised fonts and icons
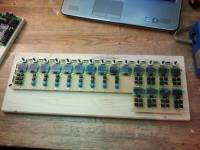
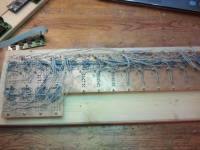
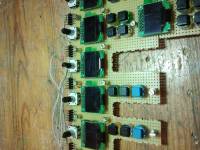
Since I successfully built my SEQv4 I used similar methods when I built the Mackie Clone. All the buttons/encoders/displays are soldered on a standard 0,1 inch pcb. I used a 500mmx100mm pcb and placed 14 of the displays on it. For the remaining 4 displays and the corresponding buttons I had to attach a smaller piece at the lower right side. This piece was a leftover from the SEQv4 pcb.
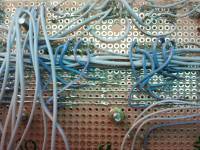
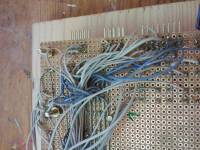
Placing and soldering the buttons and encoders wasn´t a problem. For the displays I didn´t want to span a gazillion wires so I tried another method. I used a lot of cutoff resistor legs (that´s why it is important to collect all the scrap ![]() ) and layed down six tracks on the backside of the pcb for all the lines the displays share (VSS,VDD,SDA,SLK,…). The displays were connected with short wires to the tracks. I only connected the individal CS lines with an individual spanned wire.
Although this approach is a clean and comfortable method to connect a lot of displays, I CAN NOT RECOMMEND this for bigger projects. I had to constantly resolder the tracks because they are very brittle and break every time the pcb gets bent just a little bit. I won´t use this method for future projects.
) and layed down six tracks on the backside of the pcb for all the lines the displays share (VSS,VDD,SDA,SLK,…). The displays were connected with short wires to the tracks. I only connected the individal CS lines with an individual spanned wire.
Although this approach is a clean and comfortable method to connect a lot of displays, I CAN NOT RECOMMEND this for bigger projects. I had to constantly resolder the tracks because they are very brittle and break every time the pcb gets bent just a little bit. I won´t use this method for future projects.
The connectors for the buttons/encoders I placed on the top edge of the pcb, like with the SEQv4 pcb, the connectors for all the displays I placed at the left edge.
After I finished soldering the pcb I cut out the spaces for the faders. I wanted to save space so I placed the track buttons (for mute/solo/select…) between the faders. This was easier said then done! The pcb material is very sturdy and it took a small drill, a pair of nippers and a pair of tongs to do so without damaging the already soldered parts.
After that I placed the pcb onto the frontpanel and glued it in with UHU Endfest, like I did with the SEQv4.
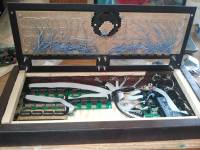
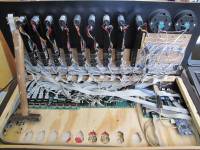
The last step was attaching the motorfaders and the jogwheel cases and putting everything into the case. Here you can see the whole box from the inside before I closed it up. (The small pcb the hammer is standing on is an unsuccesfully built midi extension for the 3. and 4. midi in/out. I left it in because I want to properly finnish it some day, but for now I don´t really need it)
The case is also made out of beech wood. I will post some pictures of how to build one in the next chapter.
The small holes you can see on the bottom of the case are for the faders. I wanted the case to be as slim as possible, but I didn´t consider the cables coming out of the fadermotors  . I didn´t want to redo the whole case (I only have limitied access to a woodshop) so I just cut out some holes.
Building a nice wooden case
Here are some pictures of the cases I built for my SEQv4 and Mackie Clone. Both are made out of beech wood, a very dense and firm wood, which can be worked with (cut, sanded, drilled into,…) very easily if one has the right tools like a sharp (!) saw blade, an electrical sander, etc.
Because I only have limited access to a woodshop (at my parents house, I live in a small flat some distance away), I made both cases simulaneously. Both consist of 4 frame parts and a baseplate out of slim cheap pine wood.
For the frontpanel there is a small strip of wood to hold it.
The trick with the baseplate is to cut a gap along the lower bound of the frame parts.
Once all elements are finsihed the 4 fram parts are just mortised, so there are no screws necessary. The baseplate is put in the gap of the frame parts.
After that all the frame parts get glued with wood glue and helt together with 2 big bar clamps until the glue has dried.
I had a lot of help from my dad with the cases, not only has he the necessary woodshop and tools, he also has a bit more experience than I do and more ideas when it comes to wood.
Here he is acknowledging our work ![]()
Midibox Mods
Here I´d like to publish stuff related to software. I´m not a programmer so what I will be posting here is not going to be deep and ingenius software mods. Instead there is going to be a list of modifications and scripts I figured out while experimenting that I find usefull enough to share with others here.
I still think a word of caution would be appropriate:
None of the stuff in this section is part of the official firmware repository. So any use you make of it will be happening at your own risk! If your Midibox suddenly blows up or melts down while exercising the tips and tricks you find here it will be your own fault, not mine. Do NOT apply any of this stuff here if you´re not FULLY aware of what you are doing!
Frontier Alphatrack Clone - script for MB_NG
The Frontier Alphatrack was one of my favourite controllers once. I used it until it broke down. Today I´m into something a little bigger but I always thought about integrating some of the funcionality into my Midiboxes. So I created a MB_NG script that emulates almost all midi events of an original Alphatrack, the lcd display message included.
The Alphatrack´s host message is located on the right side of the screen. The other stuff on the left side (Volume bar, Solo/Mute/Rec state and “Vpot”assignement) I integrated, because I created this script with my SEQ4 and this looks more clean than using the SEQ4´s leds.
For the Alphatrack clone a 2×16 character lcd is sufficient, but I think it doesn´t hurt to have a little more lcd space for custom labels.
Instead of the fader I´m using an encoder, the volume level can be reflected on the lcd, the touch sensor is replaced with a buton event.
The original Alphatrack features touch sensitive encoders, which is a very nice and handy feature. In my design I also replaced these touch sensor events with simple button events, but with some metal-shaft encoders and metal encoder knobs one can easily build some touch sensitive encoders.
All other buttons and leds are assigned in the NGC script, just the hw_ids would have to be adapted.
The MB_NG Firmware has to be modified a little bit, inside mbng_event.c a number has to be altered:
At Line 3755:
u8 x_wrap = (*stream == MBNG_EVENT_SYSEX_VAR_TXT56) ? 56 : 64;
has to be altered to:
u8 x_wrap = (*stream == MBNG_EVENT_SYSEX_VAR_TXT56) ? 56 : 16;
So that the variable ^txt can set the cursor to the second line after 16 characters.
Then the MB_NG source has to be compiled again and uploaded onto the Midibox.
I tested it with Reaper (using the genius Alphatrack-Pro extension) and with Reason 5, no problems so far.
There are some issues I couldn´t find a solution for yet:
1. Using an encoder for volume doesn´t work completey. One can send the volume value, and the midibox somehow “picks up” the right volume value from the daw, when the encoder is moved. But the Midibox doesn´t receive this value, when it is just sent by the daw.
2. I wasn´t able to recreate the touchstrip from the Alphatrack. I can create 2 buttons with the events for a 1-finger touch and a 2-finger touch, but when I tried to emulate the touchstrip movement with an encoder, it didn´t work
I believe this has to do with the pitchbend values. The encoder would need to send/receive a 10bit pitchbend value and the touchstrip a 5bit pitchbend value. But the MB_NG only provides a 14bit pitchbend value. This is not really a problem for me, since I wouldn´t use any of those 2 features for my own box, but for a complete clone, those issues would have to be resolved.
Download the scripts here:
inside the *.zip is a *.ngc configuration script and a *.ngl script for the lcd labels you see on the pictures above.
How to create custom GLCD fonts/icons/bars for Midibox NG
I created a small tutorial on how to create nice custom fonts, icons and bars for Midibox NG.
I put it on a seperate wiki page here
Disclaimer
I hope this page can be of help to other Midiboxers. I apologise for all typos, wrong technical terms and other linguistic misconducts on this page. It is still a second language to me…
My Regards
John E. Finster

