PCBs are normally made using ultraviolet light and some chemicals and acids. Most people don't have access to these tools at home, so your best shot is probably to check your local area for schools or companies who deal with this. There are also some companies who specialise in making PCBs for the private marked. If there aren't any options nearby then maybe someone in the forum can help, just ask!
Now you have your very own PCB. First thing to do is clean it if it hasn't already been done. Use some spirits (red) and some paper or cotton. Then find your multimeter, put it on "beep" and check for short-circuits. It might be a good idea to print the layout from Greg's zip onto transparent paper. That way you'll better understand the paths of the tracks and know where to check for errors.
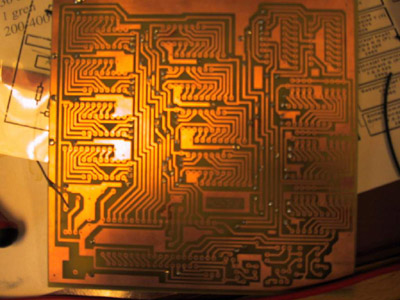
Nice and shiny ey?
This is the metal side, where you're supposed to solder.
You can see a piece of my transparent print underneath
the PCB.
Now, load up
your favourite drill. It's time to penetrate! I used a
special made drill that was mounted to the table, but if
you don't have access to one of those a normal hand held
will do fine (I did a couple by hand with success). Just
remember to mount the PCB so everything will be as steady
as possible. And don't try this if you've got Parkinson
or something. Be prepared to break a few drills too,
cause accidents happen. I would recommend 0.8-1mm for
Greg's PCB. Some of the components need 1mm holes and if
you go large you reduce the risk of breaking the drill
too.
![]()
Copyright © 2001
Tor Arne Vestbø