Table of Contents
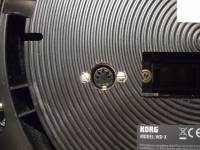
The Korg Wavedrum MIDIfied
History of the Wavedrum
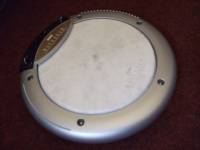
In 1994 Korg released their first Wavedrum, an electronic percussion instrument. Unlike most other electronic drums this was not just a drum pad used to trigger samples. It was rather a physical modeling synthesizer, where the actual signals from the pickups were used as stimuli for various algorithms generating more or less drum-like sounds. Nevertheless, the Wavedrum had a MIDI interface, so it could be used to trigger external drum modules too. This Wavedrum was very expensive and only few were made.
In 2009, Korg had stopped making Wavedrums a long time ago, a new Wavedrum came out, the WD-X. It is more capable of reproducing existing instruments' sounds than the 1994 model, since in addition to physical modeling also samples are used. Still, the WD-X is way less expensive than its predecessor. In the following years Korg released several developments, the Wavedrum Mini, the Wavedrum Oriental, and, most recently, the Wavedrum Global.
To keep the price low, Korg had to cut cost wherever possible. All newer Wavedrums came with a very limited user interface (no text let alone graphics - only a 3-digit seven segment display! 
MIDIfying the Wavedrum - Hardware
Signals from the wavedrum
The WD-X, the Oriental and the Global all (as far as I know) have one piezo pickup for the drumhead, two piezo pickups (just connected in series) for the rim, and a force sensor in the middle of the drumhead that can be used for instance to pitch up the drum sound by pressing down the head by hand. A Wavedrum patch can sound very different, depending not only on how strong the drum head is hit but also if it is hit at the centre or close to the rim, or if it is hit with a hard or a soft object. My goal is to transmit this information via MIDI as accurate as possible.
Interfacing the LPCXpresso board
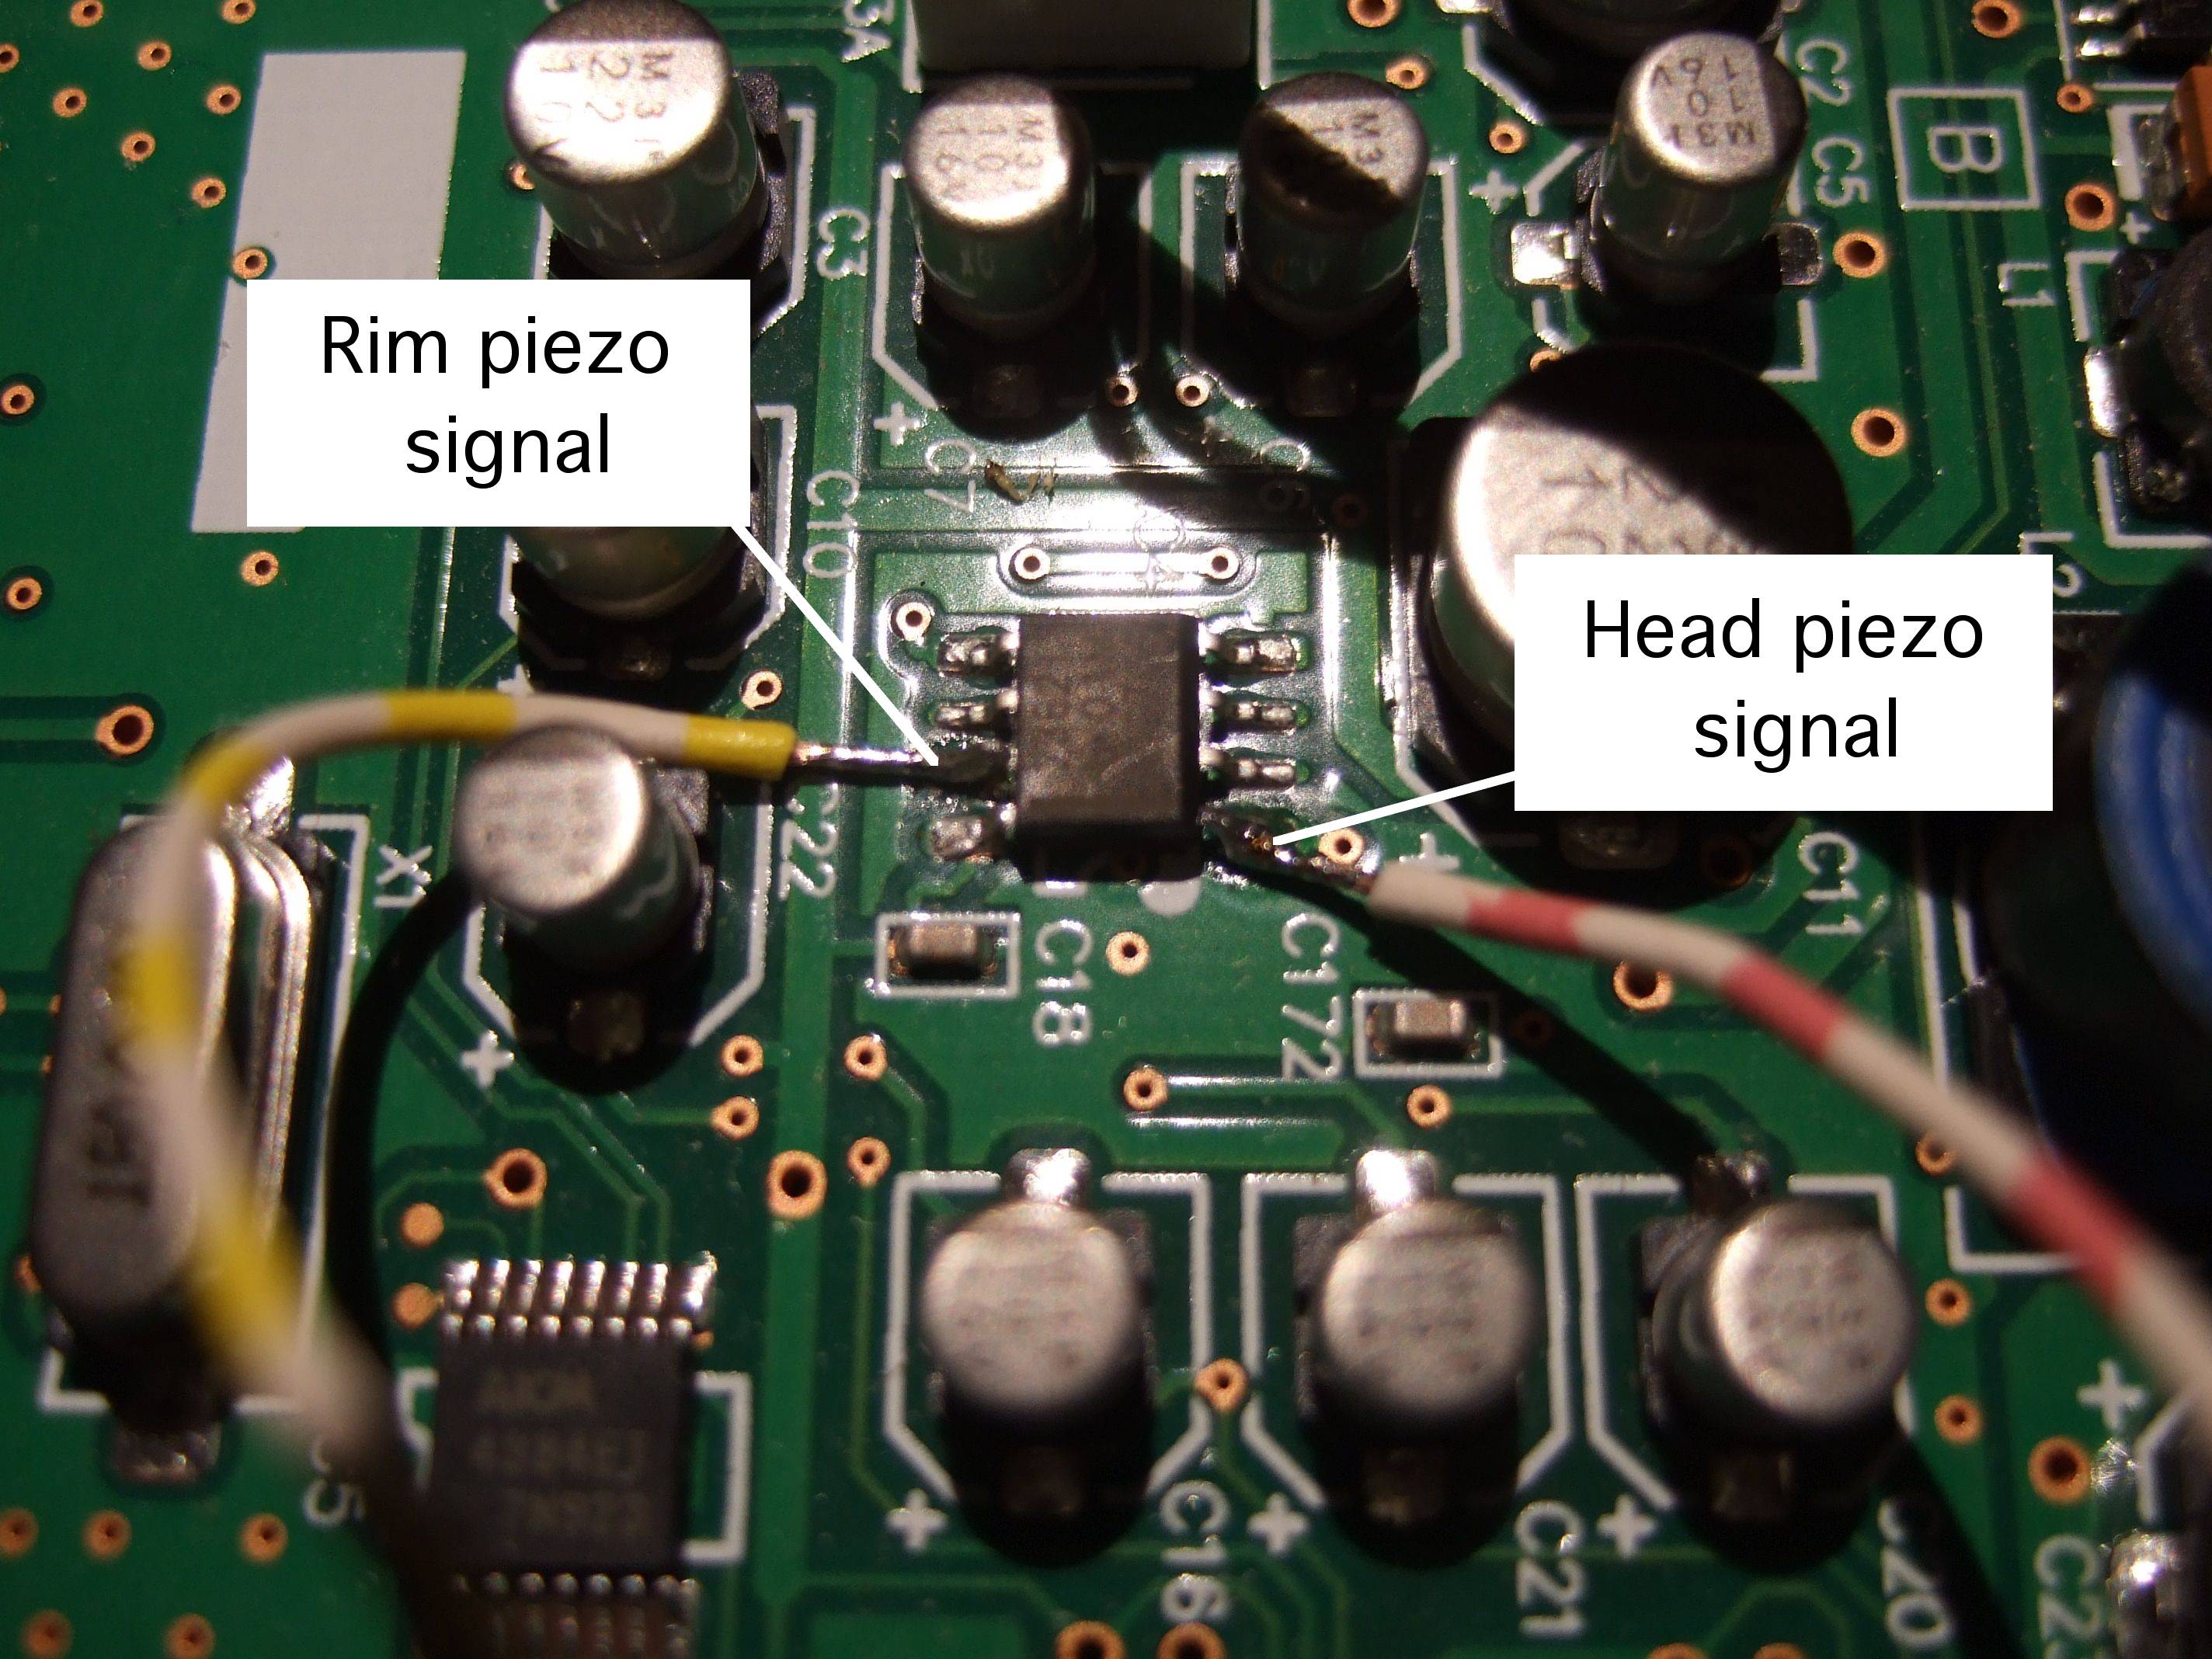
The LPC1769 microprocessor on the LPCXpresso board has an on-chip 12 bit A/D converter. Sampling both the head and the rim pickup at a rate of 10 kHz each, their waveforms can be captured quite accurately. While it would be possible to get the signals from the piezos directly, I decided to take them from the outputs of the buffer amplifiers located on the Wavedrum's KLM-2937 board:
Here the signals are centered around 2.5 volts. After a few experiments I found that these signals are too weak to be fed directly into the LPCXpresso board's ADC inputs, they need some gain.
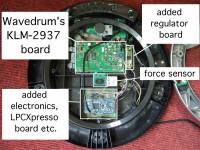
The output signal of the force sensor is captured too, of course the timing requirements are much less demanding here. Here the voltage is taken directly from the force sensing resistor, just via a simple RC low pass filter to suppress noise.
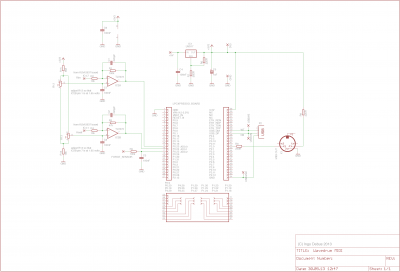
I placed the LPCXpresso board along with a dual opamp and some other components for amplifying the head and rim piezos on a piece of pad-per-hole board which fits nicely into the Wavedrum. The opamp circuitry centers the signals properly around 1.65 volts (half the supply voltage), so that they can be fed into the ADC inputs of the LPCXpresso board. It also does some low pass filtering to suppress noise. I did not solder the gain setting resistors R1, R2, R3 and R4 directly to the board but put them in sockets (similar to DIL IC sockets) instead. This way it is easier to find the proper values.
Power supply for the LPCXPresso board
The Wavedrum is powered from an external 9V/1.7A wall wart supply. Since the Wavedrum draws much less current than 1.7 amps it is possible to power the LPCXpresso board from the wall wart too. I use a simple linear regulator to get 3.3 volts from the 9 volts. The LPCXpresso board is quite a current hog, so the LM317 runs rather hot and needs a small heat sink. I placed the regulator on an extra board, but with a clever layout perhaps it would be possible to fit it onto the board carrying the LPCXpresso and the preamp too.
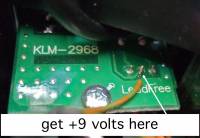
The Wavedrum is a quite noisy (electrically) environment. There are several DC/DC converters in there. The ground connection to the extra circuitry is critical. After a few experiments I found that noise is suppressed best with a single heavy wire ground connection from the sheet metal that holds the KLM-2739 board to pin 1 of the LPCXpresso board. The 9 volts are taken from the small board with the power supply jack and the on/off switch. Maybe there are better options.
Schematics
User interface
Sorry, no user interface yet. At the moment all user-alterable parameters can be edited via MIDI Sysex only.
MIDIfying the Wavedrum - Software
Download the source code here This does include the FFT stuff. Still haven't tidied it up.
Capturing the head's and the rim's signals
The ADC takes a sample every 50 microseconds. When idle, the head piezo, the rim piezos and the force sensor are sampled in turns. When a trigger on the head or on the rim is detected, i. e. a threshold is crossed, the force sensor is temporarily not sampled until 64 samples on the triggered channel (head or rim) are recorded and the event is processed. During that time the non-triggered channel (i. e. head if rim is triggered and vice versa) can still be triggered, so “simultaneous” triggers on head and rim are possible. Because the force sensor is not sampled while the head or rim signal is recorded, the sample rate here is 10 kHz.
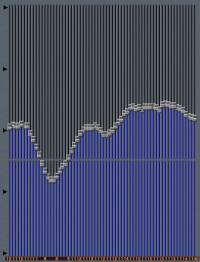
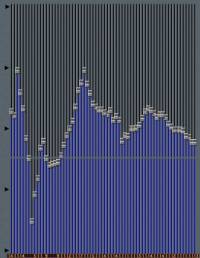
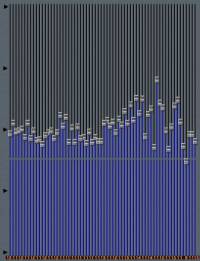
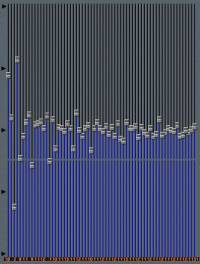
Optionally all 64 samples are output via MIDI Sysex, so the recorded signal can be viewed. Here are a few examples recorded this way:
(The screenshots are taken from SoundDiver. I'm still using Apple's ancient patch editor 
Crosstalk suppression
On the Wavedrum there is always crosstalk between head and rim. In some situations it may be desirable that only one MIDI message is generated when a trigger is detected on both pickups at the same time. When recording the head or rim signal is completed while on the other channel there's also some recording going on, the program waits until that recording is finished too and then outputs only one MIDI message for the stronger of the two signals.
Processing the signals
After 64 samples of the head or rim signal have been captured, a FFT (Fast Fourier Transform) on these samples is performed. This results in 33 (usable) frequency bins representing the spectrum of the signal. I did not program the FFT myself but took it from NXP's
AN10913. See below How to add the DSP library to the project. A short yet comprehensible introduction into the concept of the FFT including examples on how to use NXP's DSP library is given in AN10943.
I think it's amazing that the humble LPC1769 can calculate a 64-points-FFT so quickly that the delay is not noticable (at least to me). There are countless ways how the result of a FFT can be used. For the head signal, the high frequency components are stronger when the head is hit with a harder object (drumstick rather than hand), and when it's hit closer to the rim. This way a crude position detection is possible.
Only the absolute values of the complex frequency bin values are used. The correct formula would be
abs = √((real part)² + (imaginary part)²)
but I skip the square root to save execution time. So the squares of the absolute values are used rather than the absolute values themselves.
At the moment, I extract three parameters out of the FFT result: amplitude, center frequency and variance. Amplitude (better: energy) is the sum of the absolute values (or rather their squares, see above). Center frequency is sort of a “center of gravity” of the frequencies. It is calculated by summing up the products of the absolute values (their squares, that is) and the frequencies for the 33 bins and then dividing this sum by the amplitude calculated in the first step. Variance, finally, is a measure that shows whether the energy is focussed in a narrow frequency band or wide spread across many frequencies. Unlike as for center frequency, here the squares of the products of the absolute values and the frequencies are summed up. Then this sum is divided by the amplitude calculated in the first step. Finally the square of the center frequency calculated in the second step is subtracted.
Auto-zero
There are two trimpots to adjust the zero levels for the head and the rim signal (see schematics above). However, to determine the zero levels more precisely the levels at the three ADC inputs are measured on startup (after waiting for a few seconds, to allow for things to warm up). The zero levels of the head and the rim signals are also adjusted dynamically while waiting for trigger events.
Processing the force sensor
When the voltage at the force sensor changes, a MIDI Control Change, Aftertouch or Pitch Bend message can be generated. Also the note number of drum trigger events can be varied depending on pressure.
MIDI
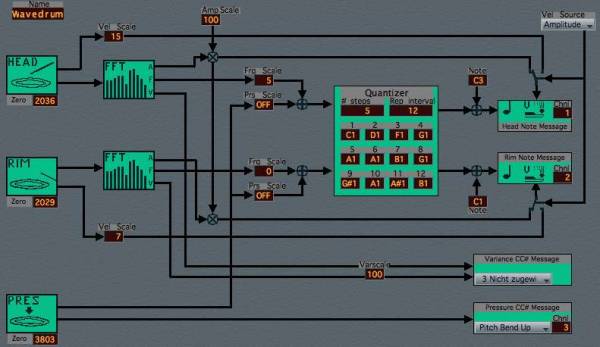
This picture shows how the signals from the sensors are processed and converted to MIDI messages. At the same time this is how the SoundDiver editor window looks like:
Note On
When the drum is hit at the head or at the rim, a Note On message is sent. The note number can be influenced by the center frequency of the FFT output (higher frequencies give higher note numbers), and by the pressure applied to the force sensor.
The velocity can be taken from the amplitude of the FFT output. Alternatively, the absolute maximum of the signal can be used.
The MIDI channel can be set individually for the head and for the rim.
Note Off
If there's a pending note with that number and channel, a Note Off message is sent first. At the moment this is the only case where Note Off messages are sent, so a note sounds infinitely until it is replaced by the same note. A programmable fixed or even velocity-dependent note length certainly would be nice, but this is not implemented yet.
Control Change, Aftertouch and Pitch Bend messages
In addition to the Note On message a CC# message representing the variance is sent. As mentioned above, the force sensor is able to generate Control Change, Aftertouch or Pitch Bend messages.
System Exclusive
Various user-settable parameters can be transmitted to the software via MIDI Sysex messages. The bulk dump format is as follows:
$F0 $7D $57 $44 $4D $49 $20 $02 $00 $00 $0l $0h….$0l $0h $F7
The $0l $0h….$0l $0h part designates a block of 512 MIDI bytes. These represent 256 parameter bytes 1) which are listed in the table below (numbered from 0 to 255). Some parameters are 16-bit, in these cases the LSByte is sent first.
When the software receives such a message, the parameters are updated. The internal settings can be requested with a dump request:
$F0 $7D $57 $44 $4D $49 $20 $01 $00 $00 $F7
The software will respond with a bulk dump as described above.
| number (decimal) | meaning | range (decimal) |
|---|---|---|
| 00..15 | patch name | ASCII chars |
| 16 | MIDI channel for rim | 0..15 |
| 17 | MIDI channel for head | 0..15 |
| 18 | MIDI channel for force sensor | 0..15 |
| 19 | MIDI note number for rim | 0..127 |
| 20 | MIDI note number for head | 0..127 |
| 21 | MIDI controller for force sensor | 0..1272) |
| 22 | trigger threshold for head and rim | 0..255 |
| 23 | above threshold max, for glitch suppress | 0..63 |
| 24 | rim velocity scale | 0..127 |
| 25 | head velocity scale | 0..127 |
| 26 | below threshold max, for glitch suppress | 0..63 |
| 27 | if 1, Sysex bulk dump is sent after each trigger | 0, 1 |
| 28, 29 | debounce time | 0..4095 |
There are some read-only parameters. These should not be altered. They are useful during software development. If parameter #27 is set to 1, a bulk dump is sent after each trigger. This way the waveform can be viewed immediately. To avoid excessive MIDI data traffic, during normal playing parameter #27 should be set to zero.
| number (decimal) | meaning | range (decimal) |
|---|---|---|
| 181, 182 | zero pressure | 0..4095 |
| 183, 184 | detected minimum | 0..4095 |
| 185, 186 | detected maximum | 0..4095 |
| 187, 188 | zero rim | 0..4095 |
| 189, 190 | zero head | 0..4095 |
| 191 | ADC from which the waveform was recorded; 0=Rim, 1=Head | 0, 1 |
| 192..255 | waveform buffer | 0..2553) |
How to add the DSP library to the project
The FFT algorithm is taken from NXP's AN10913. This ZIP archive contains several files, the library which has to be linked to the MIDIBOX project is CodeRed/cr_dsplibFFTbin_cm3/libcr_dsplibFFT_cm3.a. To link this library to the project, the line
LIBS = libcr_dsplibFFT_cm3.a
is added to the makefile.
MIDIfying the Wavedrum - Future plans
Replacing the force sensor
It's sometimes mentioned that the rebound of the Wavedrum is not great (playing with sticks, rebound helps when playing snare rolls etc). Some say this is because the force sensor pushes against the bottom side of the drum head. I think it should be possible to replace the mechanical sensor with a reflective optical sensor like the CNY70. This would not be in touch with the drum head at all, hence no impact on rebound. The sensitivity of the head pickup might be improved too. Regarding the Wavedrum's internal sounds, it might become tricky to get the same response as with the old sensor, but for the MIDI extension any desired response can be realized in software.
Separating the two rim sensors
As mentioned, there are two sensors attached to the rim, but these are just wired in series. Interpreting the two sensors' signals seperately, probably the position where the rim was hit could be detected. Of course the sum of the two signals still needs to be available for the Wavedrum's original electronics.
User interface
At least a text display and a few buttons. Unfortunately there isn't much room for this in the Wavedrum.
Improving the Wavedrum's own user interface
At the moment everything is coded into three digits or letters (letters that can reasonably be displayed in a seven-segment digit, that is). It's impossible to edit the Wavedrum's patches without looking at the user's manual all the time.
With a text display the Wavedrum's user interface would vastly be improved. Software had to monitor the Wavedrum's own six pushbuttons and its rotary encoder to keep track which parameter is edited.
Yes, I'm aware that this is a huge programming task.
Position sensing
Unlike the Roland HPD, the Wavedrum cannot sense where the drum head is hit. There are application notes from NXP on capacitive touch sensing with the LPC processors (AN11023, AN11095). I have no idea if this is feasible, but maybe regions of the drumhead can be covered with some conductive paint (from the bottom side perhaps), and, with hand playing, the region that was hit can be detected.

