Table of Contents
MIDIbox SEQ Track Position Display module
Introduction
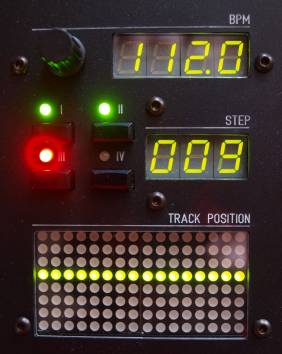
Based on an original idea by Hawkeye who implemented an 8×8 LED matrix display to show the current track position in his MB SEQ, I designed the TPD module. It does not only provide an enlarged (and duo-color) LED matrix, but also a BPM display and dedicated tempo/BPM encoder, a step display, and four freely assignable buttons with adjacent duo-LEDs for status feedback.
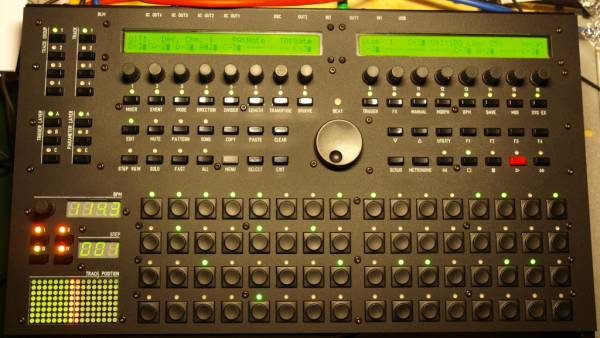
In my MIDIbox SEQv4, the TPD is sitting below Wilba's control surface panel, and to the left of my 16x4 Button LED Matrix board. This makes for a nice and clean user interface and can be easily built into a 19“ / 17” wide case.
Overview
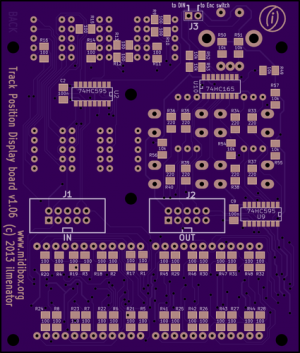
The board holds all necessary components including surface mount shift registers (DOUT and DIN) and connects via a single 10pin cable to J2 on Wilba's control surface board. An additional module (16x4 BLM) can be connected to a second 10pin connector that loops through all serial I/O signals from J8/J9 of the Core32/LPC17 board.
Schematic
The schematic for the TPD module is based on the official BPM schematic as proposed by TK over here. However, it has been extended quite significantly to incorporate all the other bling I wanted to have on my SEQ. Here it is.
As you can see, the design is self-standing, it does not need any other external elements except for the MB SEQ itself to function properly.
PCB
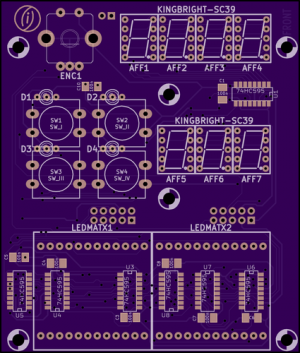
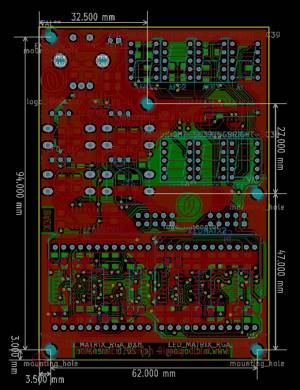
The board is relatively small at roughly 8.0cm x 9.5cm, and it holds 10 shift registers, about 60 resistors, the four buttons and LEDs, an encoder, seven 7-segment LED displays and the two 8×8 LED matrix modules. As a result it was necessary to use SMD versions of the ICs, resistors and capacitors. However, this is no big deal - with a bit of flux these are easily soldered after some practicing.
Where to buy?
If you are interested in building this, send a personal message (PM) to user ilmenator over at the MIDIbox forum (you have to register to be able to send PM). As of September 2025, I have PCBs (both the original TPD as well as the Euro TPD, see below) available for 10€ each.
Euro TPD format
Since November 2016, there is also a Euro Rack compatible PCB available that has slightly modified dimensions and component placement. Alas, the mounting holes have also been moved around a bit. This was necessary to make the TPD compatible with the Doepfer Euro Rack series - a little taller and a little less wide.
The Euro TPD uses the same components and footprints as the “standard” version, so just follow the BOM below.
BOM
| Reference | Description | Package | Value | Quantity | Mouser | Reichelt |
|---|---|---|---|---|---|---|
| R1 - R32, R41 - R48 | resistor | SMD 1206 | 100 | 40 | SMD 1/4W 100 | |
| C1 - C10 | capacitor | SMD 1206 | 100n | 10 | X7R-G1206 100N | |
| R49 - R57 | resistor | SMD 1206 | 10k | 9 | SMD 1/4W 10K | |
| R33 - R40 | resistor | SMD 1206 | 220 | 8 | SMD 1/4W 220 | |
| U1 - U9 | 74HC595 | SO16 (3.9mm / 0.15“ body width) | 9 | SMD HC 595 | ||
| U10 | 74HC165 | SO16 (3.9mm / 0.15” body width) | 1 | 863-MC74HC165ADR2G | ||
| J3 | jumper | 1 | ||||
| ENC1 | rotary encoder with switch | 1 | STEC12E08 | |||
| J1, J2 | connector 2×5 | 2 | WSL 10G | |||
| AFF1 - AFF7 | 7 segment display | Kingbright SC39 | common cathode | 7 | SC 39-11 GN | |
| D1 - D4 | 3-legged duo LED | 3mm | common cathode | 4 | 859-LTL1BEKVJNN | |
| LEDMATX1, LEDMATX2 | duo LED Matrix 8×8 | 32mm x 32mm | common cathode or anode | 2 | ||
| SW1 - SW4 | tact switch | 12mm | E-Switch | 4 | 612-TL1100 | |
| switch cap | C&K Components | 4 | 611-PEBK | |||
| connector 2×5 | 2 | PFL 10 | ||||
| flat cable | 40cm | 1 | AWG 28-10G |
U3-U8 as well as well as C3-C8 are sitting below the LED matrix modules. Obviously, you have to solder them in before you solder the matrix modules! Important: make sure that you test for proper solder joints between each leg of U3-U8 to some point not located under the LED matrix modules. If there is a problem there you won't be able to fix it once the LED matrix modules are in place! R1-R32 determine the brightness of the LED matrix modules. They are sitting on the backside of the PCB and can be changed even after you have soldered the LED matrix, should you find that necessary. The same goes for R41-R48 which adjust the brightness of the 7-segment LED displays. The 3mm duo LEDs I used are much brighter than the LED matrix modules, therefore I chose R=220Ω for these, the same value (and LED) Wilba suggests for his control surface PCB.
There is a thread over on the MIDIbox Forum discussing TPD testing and configuration. Or you use this Test-app tpd-test.zip - see the forum article above.
The most exotic component on this board is the red/green double color dot matrix module. As the LEDs are controlled via a matrix approach, it does not really matter whether you choose common cathode or common anode modules - both will work, you'll just have to specify that in the config file. I bought mine on ebay, and they are common anode types (although they were sold to me as common cathode types!). Make sure that the pinout follows this duo LED matrix datasheet!
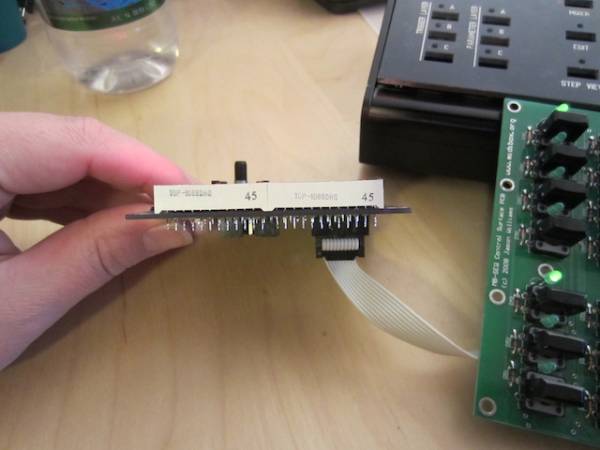
It is recommended to mount the LED matrix modules with pin 1 pointing to the lower left corner of the PCB, leaving the side with the print (“TOP-1068…”) pointing to the lower end of the PCB as in the picture below. The side print might be different on your LED matrix module - check for pin 1, there is a tiny little “1” etched into the carrier PCB of the LED matrix itself, barely visible in good light, from underneath! This guarantees bright LEDs, as otherwise the driver circuit for the green LEDs will have to source current for a complete row, making them significantly darker.
For the 7-segment displays I chose the Kingbright SC39-11 common cathode ones available at Reichelt. Check for compatibility with the SC39-11 data sheet if you want to use other displays.
Don't forget that you will also need to order a knob for the encoder!
Frontpanel
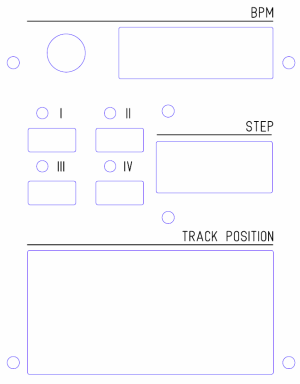
I have had my front panel laser cut by Ponoko. I used Adobe Illustrator to create the design. Here is the frontpanel file, you might want to integrate that into your own design - in my case, the TPD is part of a larger panel, see the picture above.
TK: here the frontpanel layout in .svg format (so that it can be edited with the open source tool like Inkscape, and directly ordered at Formulor)
arnonym: ! Just received my frontpanel from Formulor - unfortunately it is scaled by roughly 0.8 and does not fit! So please doublecheck the sizes when using the .svg in Inkscape.
The cutouts for the 7-segment displays and the LED matrix modules hold little plexiglass windows that I had also made at Ponoko. I have access to a (manual) milling machine, so I milled a groove surrounding each cutout on the backside of the panel. The plexiglass window has an identical groove on the front so that the two sit flush and can be glued together quite easily. You probably don't need the two inner mounting holes (above and below the STEP display) at all.
And finally, this is how it looks like with the PCB mounted to the front panel using 8mm long M3 spacers. The front panel is made from 3mm thick acrylic and the buttons stick out nicely from the front panel. Also, there is enough space between knob and panel so the encoder can be pressed down to activate the fast mode.
Config
You need to connect this PCB to the DIN/DOUT chain, in my case it is sitting behind the 16×4 BLM board. However, the position in the chain will determine the shift register numbers that you need to specify in the config file (MBSEQ_HW.V4).
For the encoder button (pressing down the encoder knob) to work, J3 needs to be closed.
The buttons might be used to switch between different display modes for the duo LED matrix modules in the future. Right now, they can already be configured to trigger any of the options definable in the config file (e.g. direct jump to bookmarks). Since V4.079 the TDP module is officially supported by TK and can be configured in the config file.
The shift register (SR) numbers depend on how you connect the TPD board - they are different depending on whether you attach it directly to Wilba's Frontpanel PCB, or whether you have placed a BLM module between the two. However, the pins for the buttons and LEDs are always the same:
| Out SR Pin | LED |
|---|---|
| Pin 0 | LED IV red |
| Pin 1 | LED III red |
| Pin 2 | LED II red |
| Pin 3 | LED I red |
| Pin 4 | LED IV green |
| Pin 5 | LED III green |
| Pin 6 | LED II green |
| Pin 7 | LED I green |
| In SR Pin | Switch |
|---|---|
| Pin 0+1 | rotary Encoder |
| Pin 2 | Encoder switch |
| Pin 3 | unused |
| Pin 4 | Tact switch I |
| Pin 5 | Tact switch II |
| Pin 6 | Tact switch III |
| Pin 7 | Tact switch IV |
A config file suitable for use with the TPD module chained after my BLM module can be found here. An example configuration (TPD directly connected to J2 of Wilba's Frontpanel PCB) can be found in the repository.
Some users have reported problems when the TPD is not the last module in the DIN/DOUT chain, presumably because there are 9 DOUTs on this module, but just one DIN, which in turn leads to an unbalanced serial output, see this post. It seems best to simply put the TPD at the end of the serial chain.

